
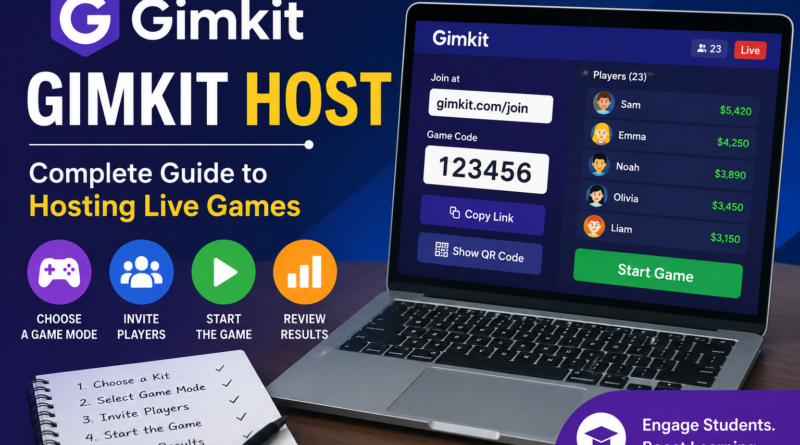
Gimkit Host: Complete Guide to Hosting Live Gimkit Games
Gimkit has become a popular classroom review platform because it combines question-based learning with interactive game mechanics. Instead of simply answering a sequence of quiz questions, students can participate in game modes that add strategy, competition, collaboration, movement, and other interactive elements to the learning experience. At the center of every live session is the Gimkit host—usually an educator who selects the learning content, chooses the game mode, controls the settings, invites participants, manages the session, and reviews the results afterward.
Becoming a Gimkit host is relatively straightforward, even for educators using the platform for the first time. A host does not need complicated software or a lengthy technical setup. According to Gimkit’s current hosting instructions, the basic process is to choose a kit, select a game mode, configure the game options, share the game code or joining method with students, and then start the game. Students can join through a game code, QR code, or direct link, depending on how the host wants to organize the session.
This guide explains what a Gimkit host does, how to host a live game step by step, how students join, which controls are available, and how teachers can make hosting smoother and more useful for classroom review. It also explains important features such as Classes, game reports, joining late, and Gimkit account requirements.
What Is a Gimkit Host?
A Gimkit host is the person who creates and controls a live Gimkit game session. In most classroom situations, this is the teacher, instructor, tutor, or activity leader. The host chooses the question set—known as a Kit in Gimkit—selects a compatible game mode, adjusts the available game settings, opens the lobby, gives students a way to join, starts the activity, and manages the session while it is running. When the game ends, the host can also review performance information through Gimkit’s reporting features.
Hosting is different from simply joining a Gimkit game. Players normally receive access to an already-created session, while the host is responsible for setting it up. Gimkit states that an account is required to create kits and host games, which means educators who plan to run live sessions need an Educator account. Creating and maintaining a Gimkit account is free, while Gimkit Pro is an optional paid upgrade. New Educator accounts currently begin with a 14-day Gimkit Pro trial before moving to Gimkit Basic if the educator does not subscribe. Students, on the other hand, do not need an account merely to participate in most live games.
The Gimkit host therefore acts as both the session organizer and game manager. However, that does not mean the teacher must constantly interfere with gameplay. A well-prepared host can configure the session before it begins and then focus on monitoring participation, helping students, observing misconceptions, and deciding when to pause or end the activity.
How to Become a Gimkit Host
To become a Gimkit host, start by creating an Educator account on Gimkit. Once logged in, you can create your own kits and host them as live games. Gimkit’s official documentation confirms that creating an account is free and that educator accounts have access to kit creation and live hosting. Some additional features and game modes may depend on whether the account uses Gimkit Basic or Gimkit Pro.
A Kit is essentially the question content used during a Gimkit activity. When creating one from scratch, educators can give the kit a name and choose its language and subject before adding questions and answers. After the kit has been created, it becomes available on the educator’s dashboard, where it can be edited or used for gameplay.
Teachers should ideally prepare their Kit before class rather than creating questions while students are waiting. Review the questions for spelling, factual accuracy, ambiguous wording, and answer choices that could confuse learners. A game can be entertaining, but the quality of the learning activity still depends heavily on the quality of the questions behind it. Questions should match the objective of the lesson, whether that objective is vocabulary practice, exam preparation, retrieval practice, concept review, or checking students’ understanding of recently taught material.
How to Host a Gimkit Game Step by Step
The current Gimkit host process follows a clear sequence. From the dashboard, find the Kit you want to use and select Play Live. The same option can also be accessed from inside a Kit. Gimkit then opens its Mode Picker, allowing the host to explore the available game modes. After selecting a mode, continue to the game options, configure the session, open the lobby, invite the students, and start the game when everyone is ready.
1. Choose Your Kit
The first task for any Gimkit host is selecting the Kit containing the questions students will answer. If you already have suitable material on your dashboard, choose it and click Play Live. When planning a classroom activity, try to select a Kit that matches what students have recently studied. A shorter, focused set of relevant questions is often more manageable than a very broad collection containing unrelated topics.
Question difficulty also matters. If nearly every question is too easy, gameplay may become more about speed than meaningful retrieval. If most questions are far beyond students’ current knowledge, frustration may replace engagement. A balanced Kit can include straightforward recall questions alongside items that require closer thinking.
2. Select a Game Mode
After choosing Play Live, Gimkit opens its Mode Picker. Gimkit offers multiple modes designed around different styles of interaction. Its official guidance notes that modes can vary in character: some are more energetic, some more calming, and others emphasize interaction, strategy, or collaboration. The Mode Picker includes labels and additional information intended to help hosts choose a mode appropriate for their group and goals.
This makes game selection an important part of hosting. A teacher looking for a quiet review session may choose differently from someone organizing an end-of-unit celebration. Similarly, a cooperative activity may be more suitable when the objective is teamwork, while another mode may make sense for individual review. Rather than automatically choosing the same game every lesson, a thoughtful Gimkit host can match the mode to the classroom environment and learning objective.
3. Configure the Game Options
Once the mode is selected, the host moves to the Game Options screen. The exact options depend on the game mode, so there is no single configuration that applies to every Gimkit session. Current Gimkit documentation says the options may include connecting Classes, enabling the Nickname Generator, choosing the goal that determines when the game ends, deciding whether players can join late, and configuring other mode-specific settings.
Spend a moment reviewing these settings instead of immediately accepting every default. Consider how long the class has available, whether late arrivals should be able to enter, how student names should appear, and which game objective best fits the lesson. If you have only fifteen minutes available for review, for example, avoid designing a session that is likely to extend beyond the remaining class time.
Gimkit also provides a specific Join in Late option. Live games currently default to allowing students to join after the session has begun, but hosts can disable this option when preparing the game. Gimkit notes that the host’s selection is saved between games, so educators should check the setting when hosting future activities rather than assuming it has returned to a particular default.
4. Open the Gimkit Lobby
After the host finishes configuring the game and continues, Gimkit opens the lobby. This is the waiting area where students enter before gameplay begins. In 2D modes, the host may see characters appear as participants join. The host can also choose whether to participate as a player or act as a spectator in supported 2D games.
The lobby gives the Gimkit host an opportunity to confirm that the correct students have joined before starting. For games where participants enter names manually, review the participant list and address inappropriate or unrecognizable names before the activity begins. Taking a few seconds to organize the lobby can prevent unnecessary interruptions later.
5. Share the Game Code, Join Link, or QR Code
Students need a way to enter the session. Gimkit currently supports several methods. The host can display the game code, share a direct join link, or show a QR code. Students using the code can go to gimkit.com/join and enter the code displayed by the host. Gimkit also allows students to scan a QR code or follow a copied game link, which can make joining faster on compatible devices.
The best joining method depends on the classroom setup. Displaying the game code works well when students have laptops and can type it easily. A direct link can be convenient in a learning management system, class chat, or shared digital workspace. A QR code can be especially useful when students are joining from tablets or phones that can scan it quickly.
6. Start the Game
Once students have entered the lobby and the class is ready, select Start Game. Gimkit’s interface places the start control differently depending on whether the selected mode is 2D or non-2D, but the purpose is the same: it moves participants from the lobby into active gameplay. During the game, hosts have access to controls for managing the session.
Before starting, it is helpful to give students a brief explanation of the activity. Even experienced Gimkit players may not know the rules of a mode they have never used. Clarifying the learning objective is equally important. Tell students whether they are reviewing for an assessment, practicing vocabulary, checking understanding, or applying a recently taught concept. This keeps the activity connected to instruction rather than making the game itself the only goal.
How Students Join a Gimkit Host Game
Joining a hosted Gimkit session is designed to be simple. According to Gimkit’s official instructions, students can look for the game code or QR code on the teacher’s screen or use a direct join link supplied by the teacher. Students entering manually visit gimkit.com/join, provide the game code, and then enter their name or approve a generated nickname when applicable. Students connected through Gimkit Classes may have an even more streamlined joining process when logged in.
One important distinction is that students generally do not need their own Gimkit accounts just to play live games. Gimkit explicitly states that student accounts are optional for live participation. Educators who use Classes, however, can connect identified students to their classroom roster, which provides additional organizational benefits.
To reduce lost instructional time, a Gimkit host should display joining instructions before inviting the class to begin. Consider projecting the code clearly, placing the direct link in a familiar digital location, or showing students exactly where to go. When thirty students start asking where to enter a code at the same time, even a simple login process can consume several minutes.
Using Gimkit Classes as a Host
Gimkit Classes provide another layer of classroom organization. Gimkit says Classes can help educators keep names appropriate in live games, track assignment progress, review results from multiple assignment completions, and allow assignment progress to be saved. Students who belong to a connected Class can also join live games automatically when appropriate, with their class names appearing on the leaderboard.
For teachers who use Gimkit regularly with the same groups, creating Classes can therefore make hosting more manageable. Instead of repeatedly identifying unfamiliar nicknames, the teacher can maintain a more consistent roster. Gimkit also allows educators to edit how student names appear within a Class.
Classes are not essential for every Gimkit host. A teacher running a one-time workshop, tutoring group, demonstration, or occasional review may prefer a simple game code or link. For regular classroom use, however, Classes can improve organization and become especially useful when educators also use Gimkit’s assignment features.
Gimkit Host Controls During Live Games
Hosting does not end when the Start Game button is pressed. During a live session, Gimkit provides host controls that allow the educator to monitor and manage the activity. Current hosting documentation says hosts can access controls involving features such as music and sound-effects volume, leaderboards, player management, and ending the game. In supported 2D games, the host can participate as a player or remain a spectator.
A good Gimkit host should resist the temptation to focus only on the leaderboard. While scores can make the experience exciting, classroom review is most useful when teachers also pay attention to patterns in student understanding. Listen to the conversations students are having, watch for repeated confusion, and use the activity as a source of information about what may need to be retaught.
Hosts can also end a session early when necessary. Otherwise, the game concludes according to the goal configured before the session. Gimkit’s current hosting guide also notes that hosts can add a minute to the remaining time in applicable games, up to the platform’s stated limit, providing some flexibility when a class needs slightly more time.
Reviewing Gimkit Game Reports
One of the most useful responsibilities of a Gimkit host happens after gameplay. For live games using a Kit that the educator owns, Gimkit provides reports containing class and individual information. Reports can be viewed when the game ends or accessed later from the Reports section of the educator dashboard. Gimkit currently provides report views including Student Overview, General Overview, and Question Breakdown. Reports can also be saved as PDF files.
This information can turn a game from a simple classroom activity into a useful formative assessment. Instead of focusing exclusively on who finished first or earned the highest game score, examine the questions students answered incorrectly. If a large percentage of the class struggled with the same concept, that may indicate a topic requiring additional explanation. If only a small number of students struggled, targeted support may be more appropriate.
A host can also use report information to improve future Kits. Questions that almost everyone misses may reveal a genuine learning gap, but they may also be poorly worded or unintentionally ambiguous. Reviewing both student performance and the quality of the questions helps teachers make future Gimkit sessions clearer and more instructional.
Tips for Being a Better Gimkit Host
Successful Gimkit hosting involves more than knowing where the buttons are. Preparation can make the difference between an efficient review session and an activity dominated by technical questions. Before class begins, open the Kit and confirm that the questions are correct. Make sure the selected game mode fits the available time, classroom environment, student age group, and lesson objective. If you plan to display the host screen, connect the projector or shared display before students begin joining.
Keep instructions short but clear. Explain how students should join, what they are expected to do, whether collaboration is permitted, and what behavior is appropriate during the game. For unfamiliar modes, briefly explain the basic objective rather than assuming students will discover everything independently. Once gameplay begins, monitor the room as much as the host dashboard. Students may need help understanding questions, resolving device problems, or staying focused on the educational purpose of the activity.
Finally, use the end of the game as an instructional opportunity. Rather than simply announcing a winner and moving on, discuss a few challenging questions, clarify common mistakes, and use the game report to identify topics worth revisiting. This approach helps keep Gimkit connected to teaching and learning rather than treating it as an isolated reward activity.
Gimkit Host vs. Gimkit Assignment
Live hosting and assignments serve different purposes. A Gimkit host runs a synchronized session in which students participate together, making live games useful for classroom review, group activities, warm-ups, or shared practice. Gimkit Assignments, by contrast, allow students to complete supported activities independently and on their own time.
Gimkit currently states that Assignments are a Gimkit Pro feature. They can be used for purposes such as independent study, homework, and distance learning, and only compatible 2D modes that do not require a group or team can be used for assignments.
Teachers do not necessarily need to choose one approach permanently. A live Gimkit host game might be used during class to introduce or review material, while an independent assignment could provide additional practice afterward when the educator has access to the required Pro features.
Common Gimkit Host Mistakes to Avoid
One common mistake is starting the game before everyone has successfully joined. Check the lobby first and compare the number of participants with the students who should be present. Another mistake is choosing a game mode purely because it looks entertaining without considering whether it suits the class period or objective. Gimkit’s own Mode Picker provides descriptions and labels precisely because different modes offer different styles of play.
Hosts should also avoid ignoring game options. A setting such as late joining can affect how the session runs, and Gimkit notes that the late-join preference can carry over from one hosted game to another.
Finally, do not treat the final leaderboard as the only meaningful result. Game mechanics and academic accuracy are not always the same thing. When instructional insight matters, the question breakdown and other reporting information can provide more useful evidence of student understanding than game position alone.
Conclusion
Being a Gimkit host is simple enough for new educators to learn quickly, but effective hosting involves more than launching a game. The basic workflow is to choose a Kit, select a game mode, configure the available options, open the lobby, share a game code, QR code, or direct link, and start the session when students are ready. During gameplay, the host can manage the activity through Gimkit’s controls, and after the game, reports can provide useful information about student responses and question performance.
For teachers, tutors, and other educators, the best results come from connecting the game to a clear learning objective. Prepare strong questions, choose a suitable mode, explain expectations, monitor students during play, and review the results afterward. When used thoughtfully, Gimkit hosting can turn ordinary question practice into a more interactive classroom experience while still giving the teacher control over content, session settings, participation, and follow-up.
Also read… QuikConsole Com: What It Is, What It Offers, and What Users Should Know in 2026
Frequently Asked Questions About Gimkit Host
1. How do I host a Gimkit game?
Log in to your Educator account, choose the Kit you want to use, and select Play Live. Choose a game mode, configure the available settings, continue to the lobby, and share the game code, QR code, or direct joining link with students. Once the participants have joined, select Start Game.
2. Do I need a paid account to be a Gimkit host?
No. Gimkit states that Educator accounts can use Gimkit Basic for free, and Basic members can host games. Gimkit Pro is an optional paid upgrade that unlocks additional features and content. New Educator accounts currently receive a 14-day Gimkit Pro trial.
3. Do students need a Gimkit account to join a hosted game?
No. Gimkit states that students can participate in live games without creating or logging into a student account. They can normally join using the host’s game code, QR code, or direct link. Student accounts become more relevant when educators use features such as Gimkit Classes.
4. Where do students enter a Gimkit host code?
Students can visit gimkit.com/join and enter the game code displayed by the host. Depending on the setup, they may also scan a QR code or use a direct game link instead of entering the code manually.
5. Can a Gimkit host see student results after a game?
Yes. When an educator hosts a Kit they own, Gimkit provides a game report with class and individual information. Reports can be opened immediately after the game or accessed later through the Reports section, with views including Student Overview, General Overview, and Question Breakdown.
ALSO read… OnlyWorkMoods Com: What Is OnlyWorkMoods.com, Is It Legit, and What Does the Website Offer?
Pingback: yokroh14210: Understanding the Meaning, Uses, and Online Identity of This Unique Term - veiwmagazine
Pingback: Quick10sec.com Official: A Complete Guide to the Fast-Paced Digital Platform - veiwmagazine